

Hi everyone! First of all I would like to thank Avinash Gupta for writing all the valuable tutorials and libraries for AVR Microcontrollers and helping people like me to build projects and learn new things. I am dedicating this post to him!
 For Excellent AVR Tutorials click here.
Introduction:Using remote keys from 1 to 4, you can control 4 appliances. You can easily extend this number to as many you wish. For example, if you press key_1 on your remote, fan will turn ON. If you press the same key again, fan will turn OFF i.e each time you press a key configured for an appliance, the condition will toggle. I have programmed the MCU such that all devices will turn OFF on pressing power button(RED COLOR on top of your remote). You can also choose combinations like turning all fans OFF at a time, etc. With little tweaking, you can change the program yourself! The status of the appliances is shown in an LCD. You can ignore this feature if you dont want LCD. I used LCD for developing the code.
I main advantage in this project is that the appliance status is stored here using internal ATmega8 EEPROM. So, whenever mains power goes off and comes again, the appliance will be in the same state in which it is before. Suppose if power goes off during night. The fan will be off. When power is back, the fan will be automatically turned on again. You dont have to search for remote again!
Another advantage using this circuit is that you dont have to use your TV Remote. You can use any DVD remote. So, chances for interference are very less. Normally when you use TV Remotes, your TV channel will also change with appliance. Personally I faced this problem in my old project. Thanks to Avinash for creating wonderful libraries for using DVD Remote.
 Circuit Explanation :
Outputs are connected to PORTC from PC0 to PC3. You can change this connection according to your wish by changing the code. The pins PC0 to PC3 are connected to IC ULN2803. This is a high voltage high current buffer. Click here to know how to use the buffer for connecting relays. Internal EEPROM is used for saving the appliance status. I searched internet for using internal EEPROM but didnt find useful information. So, I went back to datasheet of ATmega8 and I found the program there! I made the EEPROM library in my project using the datasheet. You will know about EEPROM more in datasheet. You will know the importance of datasheet once you start using it for programming the MCU. search for "eeprom_read" to understand the eeprom read operation. search for "eeprom_write" in datasheet to understand the eeprom write operation.I created the libraries using those functions only. For understanding code and C tips, click the link below for tutorial in extremeelectronics.co.in written by Avinash Gupta.
int main()
//Reading from internal EEPROM
Downloads : Click here to get the project files ( includes AVR Studio Project files and circuit diagram)


I will be updating this post regularly, so subscribe to my blog newsletter(top right of this page) for updated information. If you have any doubts, post you comments here or mail me @ arifuddin2007@gmail.comArifuddin Sheik
I main advantage in this project is that the appliance status is stored here using internal ATmega8 EEPROM. So, whenever mains power goes off and comes again, the appliance will be in the same state in which it is before. Suppose if power goes off during night. The fan will be off. When power is back, the fan will be automatically turned on again. You dont have to search for remote again!
Another advantage using this circuit is that you dont have to use your TV Remote. You can use any DVD remote. So, chances for interference are very less. Normally when you use TV Remotes, your TV channel will also change with appliance. Personally I faced this problem in my old project. Thanks to Avinash for creating wonderful libraries for using DVD Remote.
Circuit Diagram :

The project is running off using internal oscillator with 8MHz frequency. So becarefull with fuse bit settings.
Fuse bits :
Int. 8 MHz d9 e4
We are using TSOP1738 Infrared Receiver IC here to get the DVD Remote signals. The output from TSOP Sensor is connected to INT0 (pin PD2). The MCU receives the signals and appropriate action is taken (appliance switching). After switching, the status of device is stored in EEPROM. Then the status is displayed in LCD.
The commands for keys may vary from one remote to another remote. So, before using the remote, check the command values for keys and update them in "rckys.h" file. Otherwise the appliance will not switch. Use the second tutorial for getting the command codes.
To learn about IR Remote decoding, see this tutorials
To use LCD in your projects, see this tutorial. After reading this, you wont find hard to interface LCD in your project. I started using LCD in every project because you will get visual information directly regarding what is happening and program flow. It will be also useful during debugging process which you cant do using software tools. click the below link for LCD tutorial.
LCD Connection for the project :
PIN Configurations:
The lcd modules has 16 PINs for interfacing. The details are given below.
1 VSS (GND Supply) | |
2 VCC (+5V) | |
3 VEE (Contrast Adjust) | Connect to gnd for normal contrast |
4 RS | PB2 |
5 R/W | PB0 |
6 E | PD7 |
7 DB0 | Not Connected |
8 DB1 | Not Connected |
9 DB2 | Not Connected |
10 DB3 | Not Connected |
11 DB4 | PD3 |
12 DB5 | PD4 |
13 DB6 | PD5 |
14 DB7 | PD6 |
15 LED+ | Vcc |
16 LED- | Gnd |
#include
#include
#include "lcd.h"
#include "remote.h"
#include "rckeys.h"
#include "eeprom.h"
uint8_t app_1,app_2,app_3,app_4,cmd=0;
{
DDRC|=((1<<<<
//Give Some Time for other hardware to start
_delay_loop_2(0);
LCDInit(LS_BLINK);//Initialize the LCD Subsystem
LCDClear();
InitRemote();//Initialize the Remote Subsystem
/*EEPROM bits have to set to either FF or 00. In default they will be set to FF. But its better to check them using Extreme electronics USB avr burning software.
If the values are other than those, set them to 00 or FF.
00 - OFF
ff - ON
I have written the EEPROM routines using atmega8 datasheet. Refer EEPROM section in datasheet for more information regarding reading and writing of operation in EEPROM.
*/
app_1 = EEPROM_read(0);
app_2 = EEPROM_read(1);
app_3 = EEPROM_read(2);
app_4 = EEPROM_read(3);
while(1)
{
switch(cmd)
{
case RC_1:
app_1=~app_1;
//toggling the state of appliance
if(app_1==0)
PORTC|=(1<
else
PORTC&=(~(1< //Turn On the appliance_1
EEPROM_write(0,app_1);
//saving the state of appliance
break;
case RC_2:
app_2=~app_2;
//toggling the state of appliance
if(app_2==0)
PORTC|=(1<
else
PORTC&=(~(1<
//Turn On the appliance_2
EEPROM_write(1,app_2);
//saving the state of appliance
break;
case RC_3:
app_3=~app_3;
//toggling the state of appliance
if(app_3==0)
PORTC|=(1<
else
PORTC&=(~(1<
//Turn On the appliance_3
EEPROM_write(2,app_3);
//saving the state of appliance
break;
case RC_4:
app_4=~app_4;
//toggling the state of appliance
if(app_4==0)
PORTC|=(1<
else
PORTC&=(~(1<
//Turn On the appliance_4
EEPROM_write(3,app_4);
//saving the state of appliance
break;
case RC_POWER:
//turn off all the appliances
app_1=0;
app_2=0;
app_3=0;
app_4=0;
EEPROM_write(0,app_1);
EEPROM_write(1,app_2);
EEPROM_write(2,app_3);
EEPROM_write(3,app_4);
break;
}
if(app_1==0)
{LCDWriteStringXY(1,0,"A1-OFF");}
else
{LCDWriteStringXY(1,0,"A1-ON ");}
if(app_2==0)
{LCDWriteStringXY(9,0,"A2-OFF");}
else
{LCDWriteStringXY(9,0,"A2-ON ");}
if(app_3==0)
{LCDWriteStringXY(1,1,"A3-OFF");}
else
{LCDWriteStringXY(1,1,"A3-ON ");}
if(app_4==0)
{LCDWriteStringXY(9,1,"A4-OFF");}
else
{LCDWriteStringXY(9,1,"A4-ON ");}
uint8_t cmd; //dont cut and paste on the top
cmd=GetRemoteCmd(1);
/*Get Remote Command. Command is taken in last because the
the past device status has to be recovered first!
*/
}
}
Implementation :
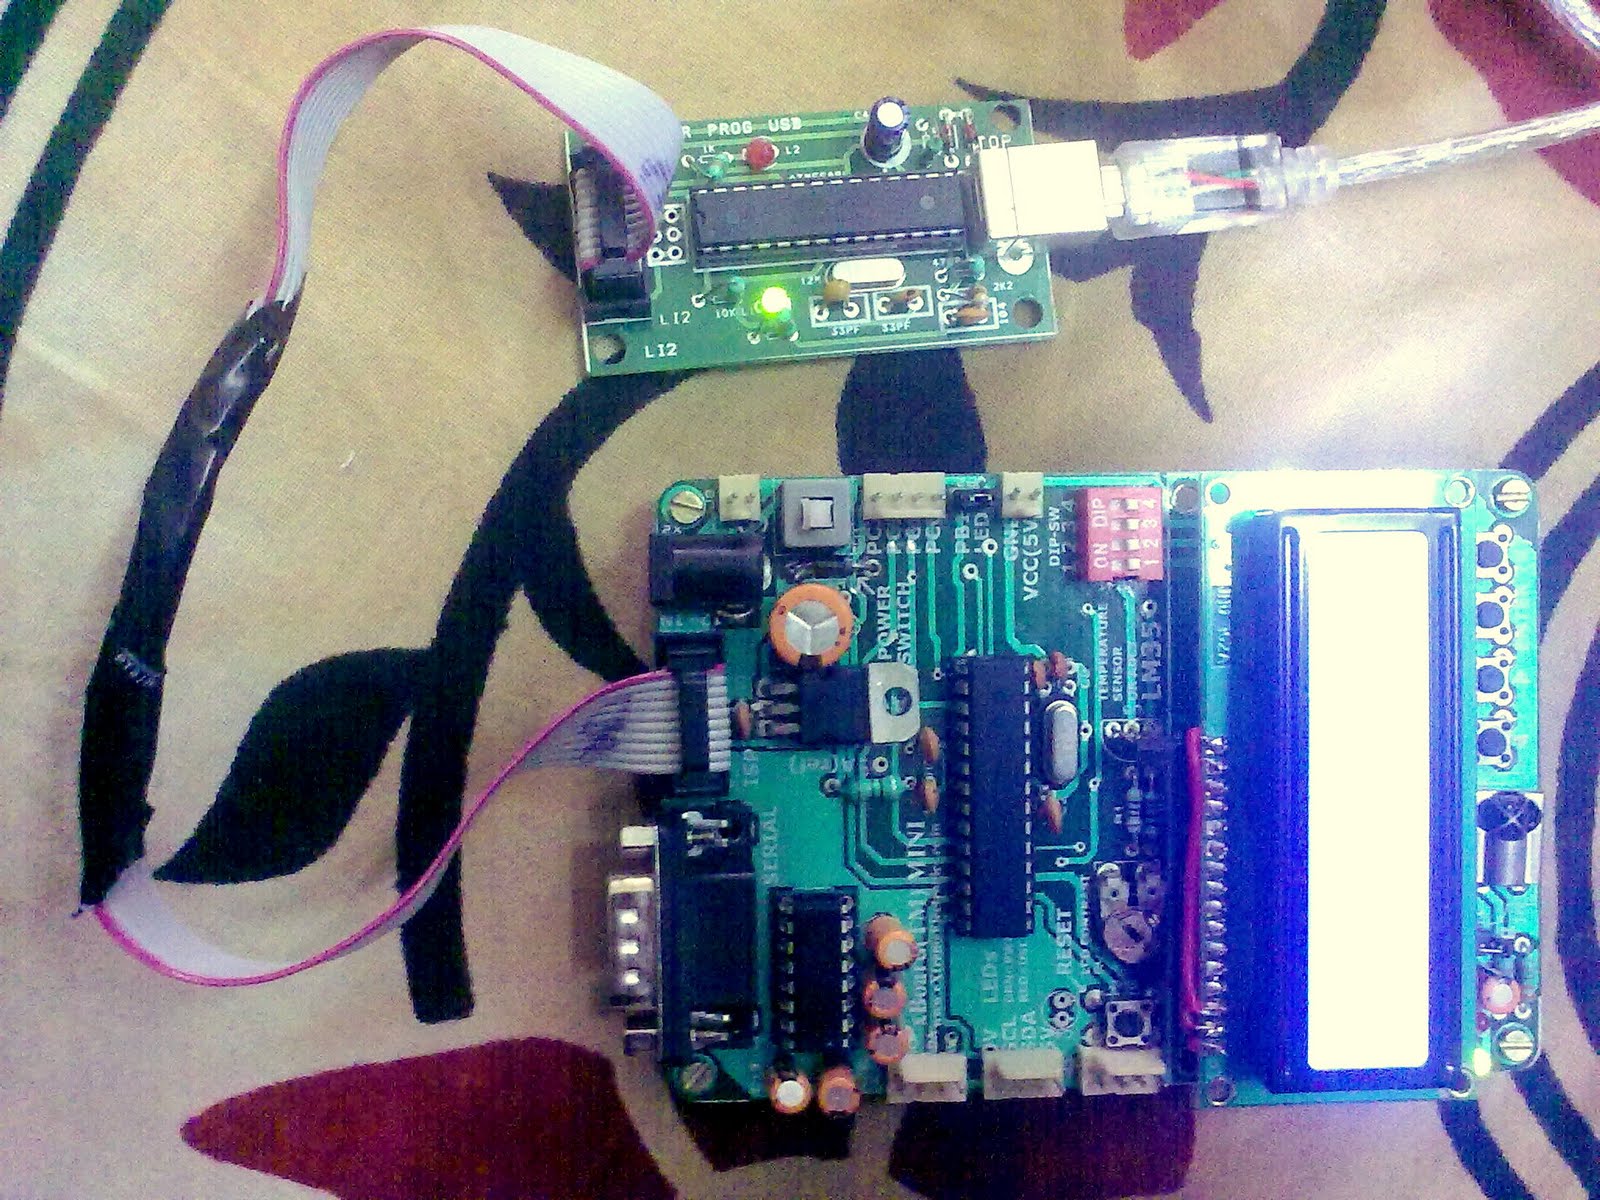
I Implemented this project on XboardMini from extremeelectronics. I am posting images of the project. I am currently improving the code for fan speed control and Room light control for the same project. Very soon, I will build the project on a demo board and will post those photos. I will be updating this post regularly, so subscribe to my blog newsletter for updated information.
Wondered how the XBoardMini is working with out power adopter? In the last photo, can you a see a red wire connecting two terminals and the ISP connector with black tape wounded around it? Yes! the development board is running from USB power supply. If you also want to power your development boards directly from your USB, view this post.
Modifying AVR Development board and Programmer

I will be updating this post regularly, so subscribe to my blog newsletter(top right of this page) for updated information. If you have any doubts, post you comments here or mail me @ arifuddin2007@gmail.comArifuddin Sheik


30 comments:
Convert C Source to HTML using this tool
http://www.newty.de/lsc/
Thanks!
good work mate.....keep it up
Thanks yar! I need some suggestion regarding using GPS modem from you. I will send details regarding that to you!
great work
thank you lot
great work
thank you lot
Very nice tutorial, I have recently become a fan of your blog.
Keep it up!
collection box
good work frnd
Hello sir
Can i use ATmega8L - 8PU Microcontroller instead of ATmega8-16PU?
hii
we r using this conept in our final year project can i have a list of hardware appratus used
and can u plz brief how to make a library in avr studio???
hello
I'm mohammed ( student )
very Nice for working (actually..It is simple circuit which can be used as a Fire Alarm)
please I wanted to help me
I want to circuit of fire alarm wireless to send and receive to (control panel or to gsm module)
reply to my email.
ma7amed_be7airy@yahoo.com
very thank you
can you please specify the remote you used in this project
Asalamlaikum sir!
I m final year student. i m working on final year project i want to make this project and i have tried this project on Atmega 8-8pu, recompling of code is giving lots of erorr. even including all the header file.
as i use ur pre compiled hex file. and burned in microcontroller its not working plz help me....
and give me ur contact no. i want help from u...
thank u...!!
Electronic project is so important for engineering students. All the suggested electronic project have been examined by several students and most of them be successful in their first effort.
Portable Appliance Tester
we r using this conept in our last season venture can i have a record of components appratus used
can it be made using arduino uno atmega328??? if yes, could u plz tel me what changes have to be made??
Please let me know how to download your code . the code is not available to download....
sorry for fast previous comment...i have downloaded the code thanks a lot...
Hi Arif will you please mail your "Remote Controlled Home Appliances project using ATmega8" full project to me on my e-mail "Tariqpvz@gmail.com", i am olso searching for remote control fan controller with eeprom support plz mail me if you Have any, Thanks
good work. You can get video help through this link. http://bit.ly/1tIwZ9y
Dear sir plz send all matter of "Remote controlled Home Appliances project using Atmega8" to my email id:surendraverma2003@gmail.com
Nice Informative Blog having nice sharing.. HOA Management Companies
Nice to be visiting your blog again, it has been months for me. Well this article that i've been waited for so long. I need this article to complete my assignment in the college, and it has same topic with your article. Thanks, great share. Refrigerator repair service
In other words toll free lines and customer support services are open through out 24 hours and 7 days a week with 20% off by ordering on online. Top Rated Air Conditioning Repair in Riverside
So, why are we seeing more and more people opting for sandstone as a paving material? asphalt road
Thanks for providing information about home appliances. If you're looking for m Heaters this season so visit Kenstar India and get the best discount. So, don't wait for so long just shop now.
Post a Comment